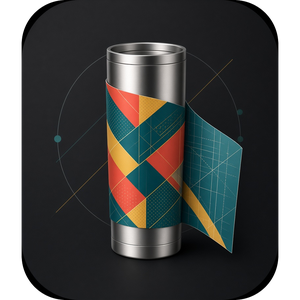
You find a lovely wrap design, print it, wrap it round a tapered tumbler, and it goes wrong: the top edge rides up, the bottom edge slopes down and the seam will not meet. The design is fine. The problem is the shape. A flat rectangle only fits a straight cup, and a tapered cup needs a curved one.
This guide explains why, how to measure your cup, and how to bend any flat design to fit, without Photoshop.
Why a straight design will not fit a tapered cup
A tapered tumbler is wider at the top than the bottom. Unroll its surface and you get a curved band, like a slice of a ring, not a rectangle. The longer top edge becomes the outer curve and the shorter bottom edge the inner curve. The bigger the difference between top and bottom, the more the band curves.
Print a rectangle and wrap it round the cup and the top edge is too short for the top of the cup, so it climbs up as you wrap. The fix is to bend the design into that curved band before you print it.
1. Measure your cup
Every blank is a little different, even when two makers sell the same ounces, so measure the one you are using. With a soft tape measure:
- Round the top of the area you want to cover
- Round the bottom of that area
- Up the side, from the bottom line to the top line, with the tape lying flat on the cup
Measure round the cup, not across it. If your top and bottom figures look like 7 cm and 9 cm, you have measured the width, not the distance round.
2. Bend the design to fit
Open Tumbler Wrap Studio in your browser and type in your three measurements, in millimetres or inches. It draws the curved template for your cup straight away. Then choose your flat design, a PNG, JPG or SVG made for a straight cup.
Pick how it fills the wrap:
- Stretch fills the whole wrap, which suits most full wrap designs
- Keep shape keeps the artwork in proportion, which suits logos and pictures
- Repeat tiles a pattern round the cup so it joins up seamlessly
Use the slider to turn the design round the cup until the seam falls where you want it, usually behind the handle or on a plain part of the design.
3. Add overlap and bleed
Add a few millimetres of overlap at the seam so there is no gap where the ends meet. The pattern carries on into the overlap, so the join matches. A millimetre or two of bleed top and bottom stops a thin white line showing at the edges.
4. Print at true size
Save the print file. It carries its own size, so when you print it at 100% or “actual size” it comes out exactly the size of your cup. Never use “fit to page”, which shrinks it.
Most tumbler wraps are wider than A4. If you only have an A4 or Letter printer, save it in two halves. They overlap by 10 mm, so you can line up the design where they meet.
For sublimation, tick “Mirror it” before you save. The design transfers face down, so it has to be printed back to front.
5. Cut and apply
For printable vinyl or waterslide, save the cut outline as well, and put the design inside the SVG if your cutter does print then cut. It opens in Cricut Design Space, Silhouette and LightBurn. Wrap from the middle outwards, keeping the top edge parallel to the rim, and finish at the seam.
Common problems and how to fix them
- The wrap rides up at one end. The top and bottom measurements are probably the wrong way round, or one is off. Measure again with the tape flat.
- The print is the wrong size. The printer has scaled it. Choose 100% or actual size and turn off “fit to page”.
- There is a gap at the seam. Add 3 to 5 mm of overlap.
- White line at the rim. Add 1 to 2 mm of bleed top and bottom.
Try Tumbler Wrap Studio free in your browser. Setting up your cup and seeing the curved design are free; a one-off licence, £7.99, unlocks saving and printing.
Related guides
New free patterns and apps
We’ll email you when we add a free pattern, a new app or a useful guide. No spam; unsubscribe any time.
See our privacy policy.